メインコンテンツまでスキップ

「Linux」タグの記事が3件件あります

全てのタグを見る

Container の互換性を調べていたら色々と脱線した話

· 約14分

概要

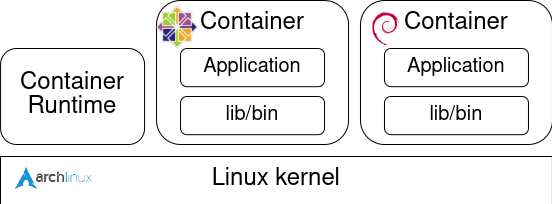
Docker などのコンテナ技術では、ホスト OS のカーネルを共有してコンテナイメージにディストリビューションやアプリケーションの依存関係を含めることで、異なる実行環境を再現しています。

このとき、ホスト OS とコンテナイメージのディストリビューションが異なるとカーネルの違いによって原理的には互換性の問題が発生するはずです。 今回は実際に古いカーネルを使用しているホスト OS 上で比較的新しいカーネルを使用しているディストリビューションを使用してアプリケーションを実行してどのような問題が起こるのか試してみました。

実行環境

  • env1

    • Host OS:
      • [mmori@localhost ~]$ cat /etc/redhat-release
        CentOS Linux release 7.9.2009 (Core)
        [mmori@localhost ~]$ uname -a
        Linux localhost.localdomain 3.10.0-1160.71.1.el7.x86_64 #1 SMP Tue Jun 28 15:37:28 UTC 2022 x86_64 x86_64 x86_64 GNU/Linux
    • Container:
      • [mmori@localhost ~]$ sudo docker image ls
        REPOSITORY TAG IMAGE ID CREATED SIZE
        rockylinux 9.3 b72d2d915008 5 months ago 176MB
  • env2

    • Host OS:
      • [mmori@localhost ~]$ cat /etc/redhat-release
        Rocky Linux release 9.3 (Blue Onyx)
        [mmori@localhost ~]$ uname -a
        Linux localhost.localdomain 5.14.0-362.8.1.el9_3.x86_64 #1 SMP PREEMPT_DYNAMIC Wed Nov 8 17:36:32 UTC 2023 x86_64 x86_64 x86_64 GNU/Linux
    • Container:
      • [mmori@localhost ~]$ sudo podman image ls
        REPOSITORY TAG IMAGE ID CREATED SIZE
        quay.io/centos/centos centos7.9.2009 8652b9f0cb4c 3 years ago 212 MB

方針

カーネルのバージョンを確認して実装されているシステムコールの差分から互換性の問題を調査する。

Red Hat Enterprise Linux のリリース日 を見ると、RHEL 7 と RHEL 9 のカーネルバージョンは以下の通り。

リリースカーネルバージョン
RHEL 7.93.10.0-1160
RHEL 9.35.14.0-362.8.1.el9_3

Linux v3.10.0 と v5.14.0 のシステムコールのテーブルを確認する。

...
309 common getcpu sys_getcpu
310 64 process_vm_readv sys_process_vm_readv
311 64 process_vm_writev sys_process_vm_writev
312 common kcmp sys_kcmp
313 common finit_module sys_finit_module

#
# x32-specific system call numbers start at 512 to avoid cache impact
# for native 64-bit operation.
#
512 x32 rt_sigaction compat_sys_rt_sigaction
513 x32 rt_sigreturn stub_x32_rt_sigreturn
514 x32 ioctl compat_sys_ioctl
515 x32 readv compat_sys_readv
516 x32 writev compat_sys_writev
...
...
309 common getcpu sys_getcpu
310 64 process_vm_readv sys_process_vm_readv
311 64 process_vm_writev sys_process_vm_writev
312 common kcmp sys_kcmp
313 common finit_module sys_finit_module
314 common sched_setattr sys_sched_setattr
315 common sched_getattr sys_sched_getattr
316 common renameat2 sys_renameat2
317 common seccomp sys_seccomp
318 common getrandom sys_getrandom
319 common memfd_create sys_memfd_create
320 common kexec_file_load sys_kexec_file_load
321 common bpf sys_bpf
322 64 execveat sys_execveat
323 common userfaultfd sys_userfaultfd
324 common membarrier sys_membarrier
325 common mlock2 sys_mlock2
326 common copy_file_range sys_copy_file_range
327 64 preadv2 sys_preadv2
328 64 pwritev2 sys_pwritev2
329 common pkey_mprotect sys_pkey_mprotect
330 common pkey_alloc sys_pkey_alloc
331 common pkey_free sys_pkey_free
332 common statx sys_statx
333 common io_pgetevents sys_io_pgetevents
334 common rseq sys_rseq
# don't use numbers 387 through 423, add new calls after the last
# 'common' entry
424 common pidfd_send_signal sys_pidfd_send_signal
425 common io_uring_setup sys_io_uring_setup
426 common io_uring_enter sys_io_uring_enter
427 common io_uring_register sys_io_uring_register
428 common open_tree sys_open_tree
429 common move_mount sys_move_mount
430 common fsopen sys_fsopen
431 common fsconfig sys_fsconfig
432 common fsmount sys_fsmount
433 common fspick sys_fspick
434 common pidfd_open sys_pidfd_open
435 common clone3 sys_clone3
436 common close_range sys_close_range
437 common openat2 sys_openat2
438 common pidfd_getfd sys_pidfd_getfd
439 common faccessat2 sys_faccessat2
440 common process_madvise sys_process_madvise
441 common epoll_pwait2 sys_epoll_pwait2
442 common mount_setattr sys_mount_setattr
443 common quotactl_fd sys_quotactl_fd
444 common landlock_create_ruleset sys_landlock_create_ruleset
445 common landlock_add_rule sys_landlock_add_rule
446 common landlock_restrict_self sys_landlock_restrict_self
447 common memfd_secret sys_memfd_secret

#
# Due to a historical design error, certain syscalls are numbered differently
# in x32 as compared to native x86_64. These syscalls have numbers 512-547.
# Do not add new syscalls to this range. Numbers 548 and above are available
# for non-x32 use.
#
512 x32 rt_sigaction compat_sys_rt_sigaction
513 x32 rt_sigreturn compat_sys_x32_rt_sigreturn
514 x32 ioctl compat_sys_ioctl
515 x32 readv sys_readv
516 x32 writev sys_writev
...

簡単に使えそうなシステムコールとして 318 番の getrandom があるのでこれを使ってみる。

調査、テストコード

getrandom

SYSCALL_DEFINE3(getrandom, char __user *, ubuf, size_t, len, unsigned int, flags)
{
struct iov_iter iter;
int ret;

if (flags & ~(GRND_NONBLOCK | GRND_RANDOM | GRND_INSECURE))
return -EINVAL;

/*
* Requesting insecure and blocking randomness at the same time makes
* no sense.
*/
if ((flags & (GRND_INSECURE | GRND_RANDOM)) == (GRND_INSECURE | GRND_RANDOM))
return -EINVAL;

if (!crng_ready() && !(flags & GRND_INSECURE)) {
if (flags & GRND_NONBLOCK)
return -EAGAIN;
ret = wait_for_random_bytes();
if (unlikely(ret))
return ret;
}

ret = import_ubuf(ITER_DEST, ubuf, len, &iter);
if (unlikely(ret))
return ret;
return get_random_bytes_user(&iter);
}
  • test code
#include <stdio.h>
#include <stdlib.h>
#include <string.h>
#include <unistd.h>
#include <sys/syscall.h>

#define BUF_SIZE 16

void print_buf(char *buf, int size) {
printf("buf = ");
for (int i = 0; i < size; i++) {
printf("%02x,", (unsigned char)buf[i]);
}
printf("\n");
}

int main() {
int ret;
char *buf = (char *) malloc(sizeof(char) * BUF_SIZE);
memset(buf, 0, BUF_SIZE);
print_buf(buf, BUF_SIZE);
ret = syscall(SYS_getrandom, buf, BUF_SIZE, 0);
printf("ret = %d\n", ret);
print_buf(buf, BUF_SIZE);
}

pidfd_open

最初は getrandom だけで試すつもりだったが、実際に実行すると centos7 のカーネルでも getrandom が使えてしまった。 (RHEL 7 のベースとなるバージョンは Linux v3.10.0 で getrandom は実装されていないはずだが、3.10.0-1160.71.1.el7.x86_64 では追加のパッチがあたっているのだろう。)

追加で pidfd_open を試してみる。

存在する pid を引数にして実行すると process を参照する file descriptor を取得できる。 man page の use case を見ると使いみちが色々とある。

   Use cases for PID file descriptors
A PID file descriptor returned by pidfd_open() (or by clone(2)
with the CLONE_PID flag) can be used for the following purposes:

• The pidfd_send_signal(2) system call can be used to send a
signal to the process referred to by a PID file descriptor.

• A PID file descriptor can be monitored using poll(2),
select(2), and epoll(7). When the process that it refers to
terminates, these interfaces indicate the file descriptor as
readable. Note, however, that in the current implementation,
nothing can be read from the file descriptor (read(2) on the
file descriptor fails with the error EINVAL).

• If the PID file descriptor refers to a child of the calling
process, then it can be waited on using waitid(2).

• The pidfd_getfd(2) system call can be used to obtain a
duplicate of a file descriptor of another process referred to
by a PID file descriptor.

• A PID file descriptor can be used as the argument of setns(2)
in order to move into one or more of the same namespaces as
the process referred to by the file descriptor.

• A PID file descriptor can be used as the argument of
process_madvise(2) in order to provide advice on the memory
usage patterns of the process referred to by the file
descriptor.

process の監視などに使えそう。 調べてみると python の新しい機能として pidfd が使われるようになっているらしい。

実装や man page については以下の通り。

/**
* sys_pidfd_open() - Open new pid file descriptor.
*
* @pid: pid for which to retrieve a pidfd
* @flags: flags to pass
*
* This creates a new pid file descriptor with the O_CLOEXEC flag set for
* the task identified by @pid. Without PIDFD_THREAD flag the target task
* must be a thread-group leader.
*
* Return: On success, a cloexec pidfd is returned.
* On error, a negative errno number will be returned.
*/
SYSCALL_DEFINE2(pidfd_open, pid_t, pid, unsigned int, flags)
{
int fd;
struct pid *p;

if (flags & ~(PIDFD_NONBLOCK | PIDFD_THREAD))
return -EINVAL;

if (pid <= 0)
return -EINVAL;

p = find_get_pid(pid);
if (!p)
return -ESRCH;

fd = pidfd_create(p, flags);

put_pid(p);
return fd;
}
  • test code (ただ呼び出すだけのコード)
#include <stdio.h>
#include <stdlib.h>
#include <sys/syscall.h>
#include <unistd.h>

int main(int argc, char *argv[]) {
int pid = getpid();
if (argc != 1) {
pid = atoi(argv[1]);
}
printf("pid: %d\n", pid);
int pidfd = syscall(SYS_pidfd_open, pid, 0);
if (pidfd < 0) {
perror("pidfd_open");
return 1;
}
printf("pidfd: %d\n", pidfd);
sleep(1000);
close(pidfd);
return 0;
}
  • test code (man page のコード)
    • 監視対象のプロセスが終了すると poll で検知できる
#define _GNU_SOURCE
#include <poll.h>
#include <stdio.h>
#include <stdlib.h>
#include <sys/syscall.h>
#include <unistd.h>

static int
pidfd_open(pid_t pid, unsigned int flags)
{
return syscall(SYS_pidfd_open, pid, flags);
}

int
main(int argc, char *argv[])
{
int pidfd, ready;
struct pollfd pollfd;

if (argc != 2) {
fprintf(stderr, "Usage: %s <pid>\n", argv[0]);
exit(EXIT_SUCCESS);
}

pidfd = pidfd_open(atoi(argv[1]), 0);
if (pidfd == -1) {
perror("pidfd_open");
exit(EXIT_FAILURE);
}

pollfd.fd = pidfd;
pollfd.events = POLLIN;

ready = poll(&pollfd, 1, -1);
if (ready == -1) {
perror("poll");
exit(EXIT_FAILURE);
}

printf("Events (%#x): POLLIN is %sset\n", pollfd.revents,
(pollfd.revents & POLLIN) ? "" : "not ");

close(pidfd);
exit(EXIT_SUCCESS);
}

実験

getrandom

getrandom を実行してみる。 (どちらでも実行できてしまったので今回の趣旨とは異なるが、一応載せておく)

env1

[root@4871234db7f8 workspace]# gcc getrandom.c
[root@4871234db7f8 workspace]# ./a.out
buf = 00,00,00,00,00,00,00,00,00,00,00,00,00,00,00,00,
ret = 16
buf = 82,92,6f,1b,87,18,1e,8a,d8,ac,7e,5a,f7,9b,59,18,

env2

[root@4b84690c185e workspace]# gcc getrandom.c
[root@4b84690c185e workspace]# ./a.out
buf = 00,00,00,00,00,00,00,00,00,00,00,00,00,00,00,00,
ret = 16
buf = 19,95,66,4c,43,bb,5f,83,b5,44,2e,6c,db,92,90,66,

pidfd_open

sleep するだけのプロセスを起動して pidfd_open で file descriptor を取得してみる。

#include <stdio.h>
#include <unistd.h>

int main() {
printf("pid: %d\n", getpid());
sleep(1000);
}

env1

host OS が centos でシステムコールが実装されていないのでエラーになる。

[root@4871234db7f8 workspace]# ./sleep
pid: 80
[root@4871234db7f8 workspace]# ./pidfd_open 80
pid: 80
pidfd_open: Function not implemented

v3.10 では do_syscall64 がなく、arch/x86/kernel/entry_64.S で syscall table を直接 call している。 直前で NR_syscall のバリデーションをしているのでここでエラーハンドリング用の badsys に飛ばされる。

飛ばされたあとはリターンしてユーザプロセスに実行が遷移し、libc の syscall() でエラーハンドリングされているはず。

env2

centos のコンテナではライブラリが古いので SYS_pidfd_open が定義されておらず、コンパイルエラーになる。

[root@4b84690c185e workspace]# gcc pidfd_open.c -o pidfd_open
pidfd_open.c: In function 'main':
pidfd_open.c:12:22: error: 'SYS_pidfd_open' undeclared (first use in this function)
int pidfd = syscall(SYS_pidfd_open, pid, 0);
^
pidfd_open.c:12:22: note: each undeclared identifier is reported only once for each function it appears in

pidfd_open は 434 番なので自分で定数を定義してコンパイルする。

#include <stdio.h>
#include <stdlib.h>
#include <sys/syscall.h>
#include <unistd.h>

+#define SYS_pidfd_open 434
+
int main(int argc, char *argv[]) {
int pid = getpid();
if (argc != 1) {
pid = atoi(argv[1]);
}
printf("pid: %d\n", pid);
int pidfd = syscall(SYS_pidfd_open, pid, 0);
if (pidfd < 0) {
perror("pidfd_open");
return 1;
}
printf("pidfd: %d\n", pidfd);
sleep(1000);
close(pidfd);
return 0;
}

実行できた。

[root@4b84690c185e workspace]# ./sleep
pid: 165
[root@4b84690c185e workspace]# ./pidfd_open 165
pid: 165
pidfd: 3

このとき、開かれた fd は procfs でみると下記のようにリンクが張られている。

[root@4b84690c185e workspace]# ls -la /proc/166/fd
total 0
dr-x------. 2 root root 0 May 3 05:28 .
dr-xr-xr-x. 9 root root 0 May 3 05:23 ..
lrwx------. 1 root root 64 May 3 05:28 0 -> /dev/pts/2
lrwx------. 1 root root 64 May 3 05:28 1 -> /dev/pts/2
lrwx------. 1 root root 64 May 3 05:28 2 -> /dev/pts/2
lrwx------. 1 root root 64 May 3 05:28 3 -> anon_inode:[pidfd]

pidfd_open + poll

man page にあるコードを使用してプロセスの監視を行ってみる。

env1

実行できないのはわかっているのでスキップ

env2

先ほどと同様に sleep するプロセスを起動して監視してみる。

[root@4b84690c185e workspace]# ./sleep
pid: 185
^C

ctrl+c で終了させると poll が検知して終了した。

[root@4b84690c185e workspace]# ./pidfd_open_poll 185
Events (0x1): POLLIN is set

追加 (pidfd_send_signal)

pidfd_send_signal を使ってみる。

こちらも試すだけなら man page のコードを使うだけで良さそう。

#define _GNU_SOURCE
#include <fcntl.h>
#include <limits.h>
#include <signal.h>
#include <stdio.h>
#include <stdlib.h>
#include <string.h>
#include <sys/syscall.h>
#include <unistd.h>

static int pidfd_send_signal(int pidfd, int sig, siginfo_t *info,
unsigned int flags)
{
return syscall(SYS_pidfd_send_signal, pidfd, sig, info, flags);
}

int main(int argc, char *argv[])
{
int pidfd, sig;
char path[PATH_MAX];
siginfo_t info;

if (argc != 3) {
fprintf(stderr, "Usage: %s <pid> <signal>\n", argv[0]);
exit(EXIT_FAILURE);
}

sig = atoi(argv[2]);

/* Obtain a PID file descriptor by opening the /proc/PID directory
of the target process. */

snprintf(path, sizeof(path), "/proc/%s", argv[1]);

pidfd = open(path, O_RDONLY);
if (pidfd == -1) {
perror("open");
exit(EXIT_FAILURE);
}

/* Populate a 'siginfo_t' structure for use with
pidfd_send_signal(). */

memset(&info, 0, sizeof(info));
info.si_code = SI_QUEUE;
info.si_signo = sig;
info.si_errno = 0;
info.si_uid = getuid();
info.si_pid = getpid();
info.si_value.sival_int = 1234;

/* Send the signal. */

if (pidfd_send_signal(pidfd, sig, &info, 0) == -1) {
perror("pidfd_send_signal");
exit(EXIT_FAILURE);
}

exit(EXIT_SUCCESS);
}

sleep プロセスを作成して SIGTERM(15) を送信したところプロセスを終了させることができた。

[root@4b84690c185e workspace]# ./sleep
pid: 222
Terminated
[root@4b84690c185e workspace]# ./pidfd_send_signal 222 15

まとめ

  • Container では host os のカーネルを共有しているため、期待されるカーネルバージョンの違いによってうまく動作しないアプリケーションがある。
  • Systemcall の実装状況も影響するため、互換性を確認する際には注意が必要。
  • 自分の周囲ではこの問題がそこまで指摘されていない(顕在化していないのは)ホストOS のバージョンが比較的新しいことや新しいシステムコールなどがそこまで使用されていないからかもしれない。
    • python3.9 では pidfd が使われているようなので、centos 上のコンテナで新しい python を使うと問題が起こるかもしれない
  • pidfd + poll を使ったプロセス監視や signal の送信などが単純に面白かった

perf を使ったプログラムとカーネルの解析方法を学ぶ

· 約8分

Overview

便利そうだとは思いながら、使っていなかったツールの一つとして perf がある。 今回は perf の最低限の使い方を学ぶ。

Goal

  • 適当なアプリケーションを perf で解析する
  • flamegraph にすることができるらしいのでやってみたい
  • GUI で使えそうなものがあったら調べる

Preparation

perf 関連

必要なパッケージをインストールする。 perf だけで良ければこれでインストールできる。

sudo pacman -S perf

arch だと linux-tools のグループの中に色々入っているのでこれで入れても良さそう。

% paru -Sg linux-tools
linux-tools bootconfig
linux-tools bpf
linux-tools cgroup_event_listener
linux-tools cpupower
linux-tools hyperv
linux-tools perf
linux-tools tmon
linux-tools turbostat
linux-tools usbip
linux-tools x86_energy_perf_policy

flamegraph を作成する上で必要なパッケージもインストールする (AUR にある)。

paru -S flamegraph

perf でカーネルの解析をするためには perf_event_paranoid というカーネルパラメータを変更する必要がある。 これはカーネルのパフォーマンスイベントを取得するためのパラメータでデフォルトでは 2 になっているが、それだとカーネルのイベントを取得できないので -1 に変更する。

FYI: https://www.kernel.org/doc/html/latest/admin-guide/perf-security.html#unprivileged-users

cat /proc/sys/kernel/perf_event_paranoid
echo -1 | sudo tee /proc/sys/kernel/perf_event_paranoid

fio

今回は I/O のベンチマークを取るためのツールである fio をテスト用のアプリケーションとして使用する。

sudo pacman -S fio

fio の使い方を調べていて、ioengine という設定項目があることがわかった。 せっかくなのでこの ioengine を色々と変えたときにどのような挙動の違いがあるかを perf で解析してみる。

ちなみに、fio の man を見ると設定できる ioengine はかなり色々あることがわかる。

FYI: https://manpages.org/fio

特にこだわりはないが、今回は libaio, sync, mmap で試してみる。

Memo about perf

  • perf stat で実行時間や CPU の使用率などを表示する
    • 試しに pwd を実行したときの結果を以下に示す
    • % perf stat pwd
      /home/mori/workspace/perf

      Performance counter stats for 'pwd':

      1.83 msec task-clock:u # 0.161 CPUs utilized
      0 context-switches:u # 0.000 /sec
      0 cpu-migrations:u # 0.000 /sec
      67 page-faults:u # 36.526 K/sec
      317,835 cycles:u # 0.173 GHz
      232,109 instructions:u # 0.73 insn per cycle
      52,250 branches:u # 28.485 M/sec
      3,235 branch-misses:u # 6.19% of all branches

      0.011358294 seconds time elapsed

      0.000000000 seconds user
      0.003322000 seconds sys
    • branch-misses は投機実行の失敗のことを指しているらしい
    • context-switches はスケジューラが切り替えた回数のことではないらしい
    • sleep コマンドでも、pthread を使ったプログラムでも、0 になった
  • perf bench はいくつかのベンチマークツールを提供している
    • % perf bench
      Usage:
      perf bench [<common options>] <collection> <benchmark> [<options>]

      # List of all available benchmark collections:

      sched: Scheduler and IPC benchmarks
      syscall: System call benchmarks
      mem: Memory access benchmarks
      numa: NUMA scheduling and MM benchmarks
      futex: Futex stressing benchmarks
      epoll: Epoll stressing benchmarks
      internals: Perf-internals benchmarks
      breakpoint: Breakpoint benchmarks
      uprobe: uprobe benchmarks
      all: All benchmarks
  • プログラムの詳細な分析には perf record を使い、結果を表示するには perf report を使う
    • perf record を実行すると perf.data というファイルに結果が保存される(-o オプションで変更可能)
    • -e オプションでイベントを指定することができ、指定できるイベントは perf list で確認できる
    • -g オプションをつけると call graph を取得することができ、後で使う flamegraph を作成するためには必要
    • perf report で -i オプションをつけて record で取得した perf.data を指定すると結果を表示することができる
  • perf top はリアルタイムの perf report のようなもの
  • perf scriptperf recoed の結果をスクリプトとして出力する
    • タイムスタンプとイベントの名前とイベントの詳細が出力される
    • flamegraph はこれをもとに作成される
  • perf annotate でアセンブリコードにアノテーションを付ける
  • perf diff は perf.data を比較するために使用する
    • パフォーマンス改善を行ったときに効果を検証するために使用できる
  • perf kvm は KVM に関するプロファイルを取得するために使用する
    • perf kvm --guest record でゲストマシンのプロファイルを取得できるらしいが、少し試したところうまくできなかったのでまた後で調べる

Example

実際に fio に対して perf を使用してみる。

スクリプトや作成した flamegraph は Forest0923/perf-flamegraph-test に上げたが、以下にも簡単に載せておく。

ioengine を libaio にしたときの perf.data を取得するコマンドは以下のようになった。

perf record -o /tmp/perf_libaio.data -g fio configs/seq_read_libaio.ini

これで得られたパフォーマンスデータを flamegraph にするには以下のようにする。

perf script -i /tmp/perf_libaio.data | stackcollapse-perf.pl | flamegraph.pl > images/perf_libaio.svg

record の際に -g をつけないと call graph を取得できないので注意。

ioengine を libaio, sync, mmap に変えたときの flamegraph は以下のようになった。

libaio:

sync:

mmap:

unknown となっている部分が多いが、fio を自前でビルドしてデバッグ情報をつけるようにすればおそらく解決する。

しっかり調査したい場合はビルドをし直して flamegraph や perf report, perf diff を使ってそれぞれの違いを調べたり改善したときに効果を確認すると良さそう。

Other tools

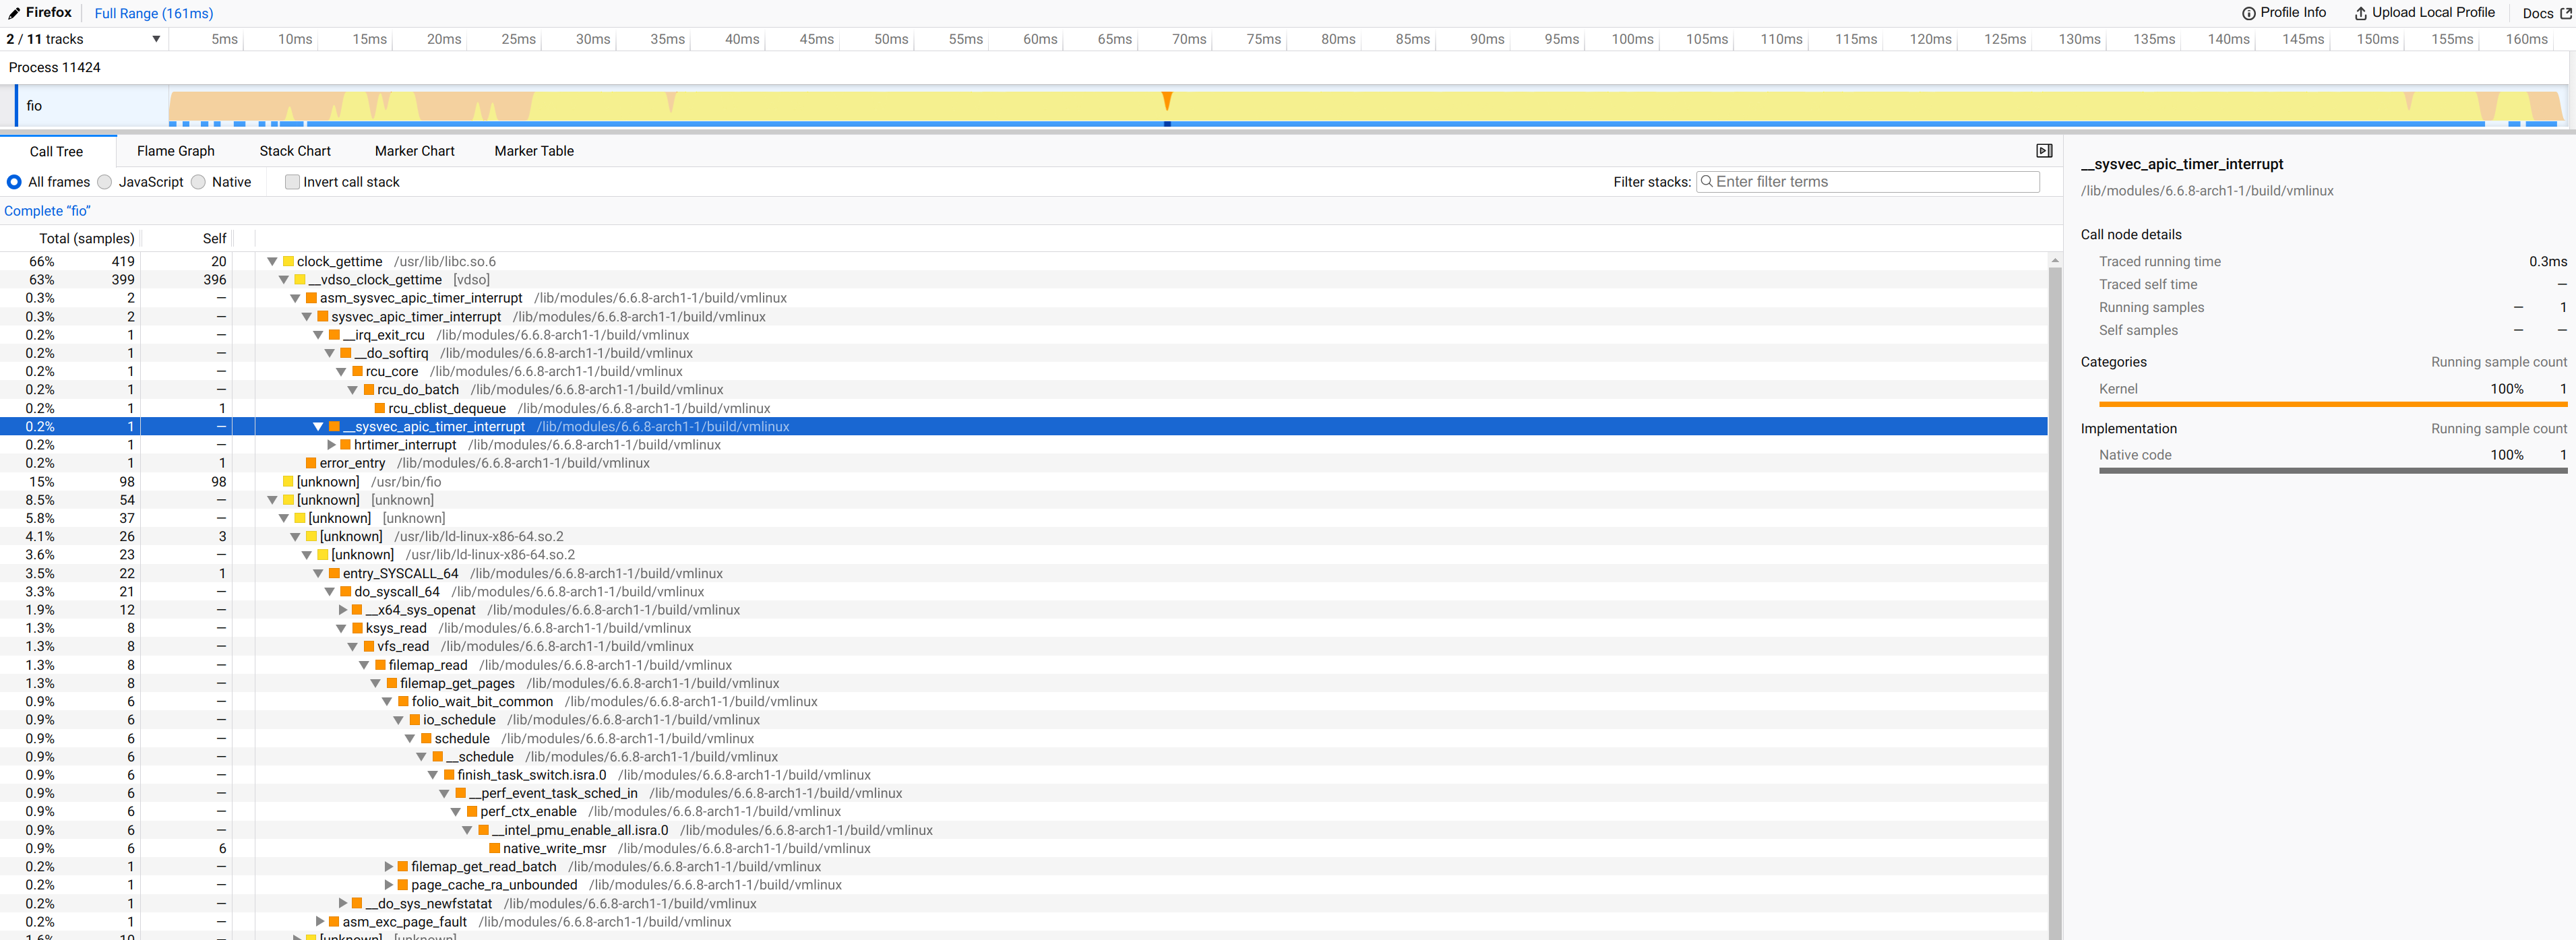
割と最近知ったツールで hotspot というものがある。 これは perf の結果を GUI で表示するためのツールで、flamegraph にも対応しているらしい。 (arch では aur にあるが、入れてみたところビルドエラーになった)

perf について調べていたときに qiita で紹介されていたツール。 下記コマンドで得られた test.perf をアップロードすると下の画像のように表示される。

perf script -i /tmp/perf_libaio.data -F +pid > test.perf

Wrap up

OS アップデートやアプリケーションのアップデートでパフォーマンスに影響が出たときに perf を使ってボトルネックの調査をしたり、改善するためのヒントを得ることができそうなので積極的に使っていきたい。

Steam Deck が発売されたので中身を見ていく‼

· 約15分

steamdeck

はじめに

Steam Deck は Valve が開発したゲーム機のふりをした Linux マシンで Arch Linux をベースにした SteamOS を搭載しています.

Arch ユーザとしてはさわらずにはいられないなのでこの記事ではデスクトップモードにして Steam Deck の中身を見ていきます.

デスクトップモード

Steam Deck を起動するとゲーム用のモードで起動するので,まずは KDE のデスクトップに入る必要があります.

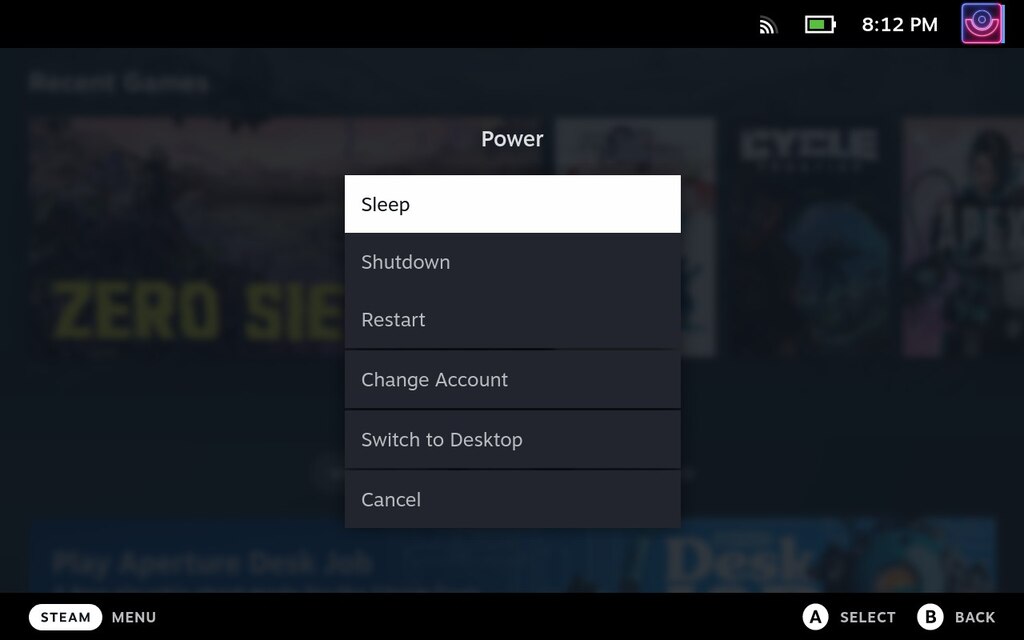
電源ボタンを長押しするとこのようなメニューが出てくるので,Switch to Desktop を選択します.

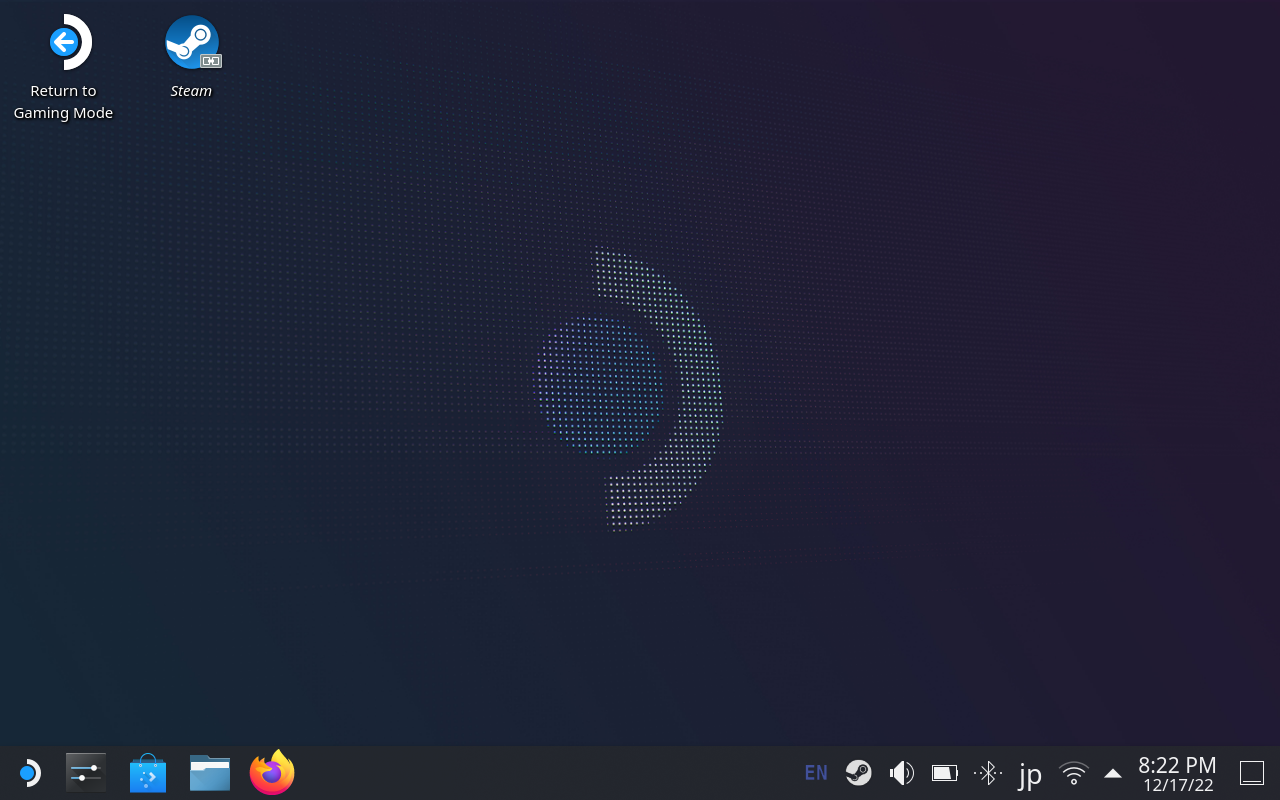
これで KDE のデスクトップに切り替わります!

Konsole がインストールされていたので,早速 SteamOS のインストールされた状態を見てみましょう.

ログインユーザの状態(などなど)

ログインユーザ名は deck で id, groups の結果はこんな感じでした.いたって普通ですね.

(deck@steamdeck ~)$ id
uid=1000(deck) gid=1000(deck) groups=1000(deck),998(wheel)
(deck@steamdeck ~)$ groups
wheel deck

ちなみにシェルは bash ですが,エラーコードが出るなどプロンプトは見やすくなってます.

ただ,.bashrc と .bash_profile はまっさらでした.

#
# ~/.bashrc
#

# If not running interactively, don't do anything
[[ $- != *i* ]] && return
#  SPDX-License-Identifier: MIT
#
# Copyright © 2020 Collabora Ltd.
# Copyright © 2020 Valve Corporation.
#
# This file is part of steamos-image-recipes.
#
# steamos-image-recipes is free software; you can redistribute it and/or modify
# it under the terms of the GNU Lesser General Public License as published
# by the Free Software Foundation; either version 2.1 of the License, or
# (at your option) any later version.

#
# ~/.bash_profile
#

[[ -f ~/.bashrc ]] && . ~/.bashrc

どこか別の場所でプロンプトの環境変数だけ設定しているみたいですね.

(deck@steamdeck ~)$ echo $PS
$PS1 $PS2 $PS4
(deck@steamdeck ~)$ echo $PS1
(\[\033[1;32m\]\u@\h\[\033[1;34m\] \W\[\033[0m\])\$
(deck@steamdeck ~)$ echo $PS2
>
(deck@steamdeck ~)$ echo $PS4
+

脱線ついでに,tty の切り替えをやってみましたが,画面が真っ暗になるだけでログインプロンプトは表示されませんでした.

プリインストールされているパッケージ

それでは次にインストールされているパッケージを確認しようと思います.

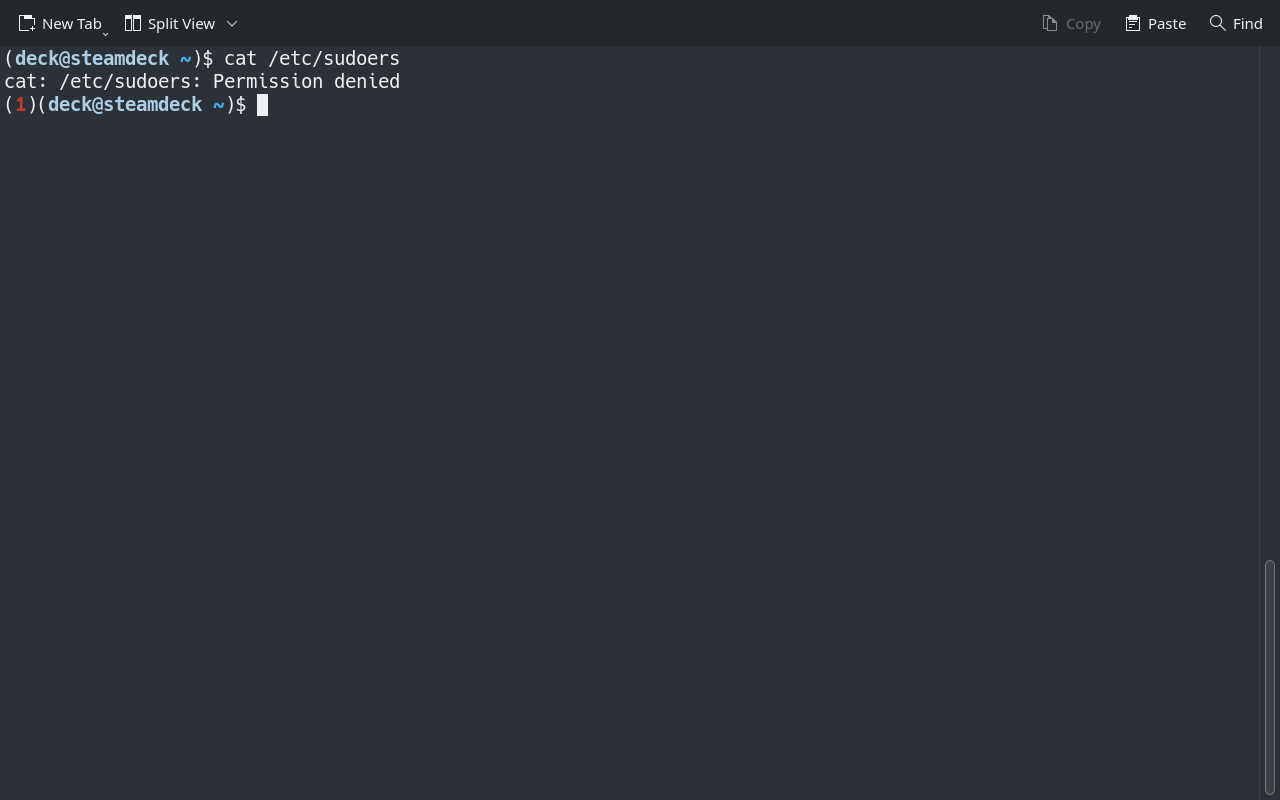
Arch ベースなので sudo pacman -Q を実行したいのですが,その前にパスワードの設定をします.

passwd

パッケージリストはそこそこ多かったので gists に入れておきます.

SteamOS_preinstalled_pkgs.log

なんとなく目についたのはこのあたり.

  • AMD のチップだから amd-ucode が入ってる
  • btrfs-progs が入ってるけど Btrfs なの?
  • holo-* と steam* 関連は SteamOS 特有のなにか
  • holo-sudo は何ができるのか?
  • networkmanager は安定
  • openssh と openvpn がもともと入ってる
  • sshfs どこで使うんだろう?
  • なぜか zsh がすでに入ってる

AUR helper は yay が入っているようです.

(deck@steamdeck ~)$ yay -V
yay v10.3.0.r0.g4a93199 - libalpm v13.0.1

AUR からインストールされているパッケージはないみたい.「使いたいユーザは勝手に使えば?」みたいな感じなのかな….

ミラーリスト

ミラーリストは Steam Deck 用のサーバのみのようです.

(deck@steamdeck ~)$ cat /etc/pacman.d/mirrorlist
Server = https://steamdeck-packages.steamos.cloud/archlinux-mirror/$repo/os/$arch

Manjaro と同じで Arch のミラーよりもワンクッションおいて安定性を求める感じかなと妄想してみる.

ちなみにカーネルのバージョンは v5.13.0 のカスタムカーネルのようです.2022年10月3日なので2ヶ月位遅いのかな?(カスタムしたのが2ヶ月前なだけでベースバージョンはもっと前のやつかも)

(deck@steamdeck ~)$ uname -a
Linux steamdeck 5.13.0-valve21.3-1-neptune #1 SMP PREEMPT Mon, 03 Oct 2022 23:17:36 +0000 x86_64 GNU/Linux

Arch の現在のカーネルバージョンは v6.0.12 なので割と差が開いていますね.

mori@thinkpad-arch ~ % uname -a
Linux thinkpad-arch 6.0.12-arch1-1 #1 SMP PREEMPT_DYNAMIC Thu, 08 Dec 2022 11:03:38 +0000 x86_64 GNU/Linux

autostart, systemd

起動時に自動で実行されるアプリケーションを見てみます.ここで Steam Client が実行されているはず(多分).

(deck@steamdeck ~)$ ls -la .config/autostart/
total 8
drwxr-xr-x 2 deck deck 4096 Dec 17 17:34 .
drwxr-xr-x 17 deck deck 4096 Dec 17 20:57 ..
lrwxrwxrwx 1 deck deck 58 Dec 17 17:34 steamos-update-os-notifier.desktop -> /usr/share/applications/steamos-update-os-notifier.desktop

アップデートがあるときに通知するだけのやつみたいです.

[Desktop Entry]
Name=SteamOS Update Operating System Notifier
Comment=KUpdate Notifier for the new systemtray specification
Exec=/usr/lib/steamos/steamos-update-os-notifier
Icon=system-software-update
Type=Application
NoDisplay=true
OnlyShowIn=KDE
Keywords=kupdate-notifier;system;update;updater

じゃあ systemd にあるのかと思って systemctl list-units したけど特に見当たらず….というか user が実行しそうな気がするからそもそも systemd に登録するはずないか…?

Steam client の実行については今の所不明ですが,systemd のターゲットの中に cryptsetup を見つけました.

...
home-swapfile.swap loaded active active Swap
basic.target loaded active active Basic System
bluetooth.target loaded active active Bluetooth Support
cryptsetup.target loaded active active Local Encrypted Volumes
getty.target loaded active active Login Prompts
graphical.target loaded active active Graphical Interface
integritysetup.target loaded active active Local Integrity Protected Volumes
...

ディスク暗号化してるのかと思いましたが,パッケージリストにはそれらしきものはないので結局よくわかりませんでした.

dm-crypt であれば mkinitcpio のコンフィグになにかあるかと思いましたが,そもそも /etc/mkinitcpio.conf が存在しませんでした.

どうやって initramfs を作っているのか…?

ディスクとパーティション

接続されたデバイスは 512 GB の SSD のみでした.

なにやら複数のパーティションが作られていますね.

(deck@steamdeck ~)$ lsblk
NAME MAJ:MIN RM SIZE RO TYPE MOUNTPOINTS
nvme0n1 259:0 0 476.9G 0 disk
├─nvme0n1p1 259:1 0 64M 0 part
├─nvme0n1p2 259:2 0 32M 0 part
├─nvme0n1p3 259:3 0 32M 0 part
├─nvme0n1p4 259:4 0 5G 0 part /
├─nvme0n1p5 259:5 0 5G 0 part
├─nvme0n1p6 259:6 0 256M 0 part /var
├─nvme0n1p7 259:7 0 256M 0 part
└─nvme0n1p8 259:8 0 466.3G 0 part /var/tmp
/var/log
/var/lib/systemd/coredump
/var/lib/flatpak
/var/lib/docker
/var/cache/pacman
/srv
/root
/opt
/home

fstab ファイルの中身を確認するとこんな感じでした.

(deck@steamdeck ~)$ cat /etc/fstab
# Static information about the filesystems.
# See fstab(5) for details.

# <file system> <dir> <type> <options> <dump> <pass>
# SteamOS partitions
#/dev/disk/by-partsets/self/rootfs / ext4 defaults 0 1
#/dev/disk/by-partsets/self/var /var ext4 defaults 0 2
/dev/disk/by-partsets/self/efi /efi vfat defaults,nofail,umask=0077,x-systemd.automount,x-systemd.idle-timeout=1min 0 2
/dev/disk/by-partsets/shared/esp /esp vfat defaults,nofail,umask=0077,x-systemd.automount,x-systemd.idle-timeout=1min 0 2
/dev/disk/by-partsets/shared/home /home ext4 defaults,nofail,x-systemd.growfs 0 2

とりあえず ext4 でフォーマットしてるのかな?

lsblk したときの nvme0n1p8 の表記が btrfs のサブボリュームの表記の仕方に似ていたので btrfs なのかと思ったけど違いました.

cf:

mori@thinkpad-arch ~ % lsblk
NAME MAJ:MIN RM SIZE RO TYPE MOUNTPOINTS
nvme0n1 259:0 0 476.9G 0 disk
├─nvme0n1p1 259:1 0 100M 0 part /boot
├─nvme0n1p2 259:2 0 16M 0 part
├─nvme0n1p3 259:3 0 220.3G 0 part
├─nvme0n1p4 259:4 0 548M 0 part
└─nvme0n1p5 259:5 0 256G 0 part /var/log
/home
/.snapshots
/
mori@thinkpad-arch ~ % cat /etc/fstab
───────┬──────────────────────────────────────────────────────────────────────────────────────────────────────────────────────────────────────────────────────────────────────────────────────────────
│ File: /etc/fstab
───────┼──────────────────────────────────────────────────────────────────────────────────────────────────────────────────────────────────────────────────────────────────────────────────────────────
1 │ # Static information about the filesystems.
2 │ # See fstab(5) for details.
3 │
4 │ # <file system> <dir> <type> <options> <dump> <pass>
5 │ # /dev/nvme0n1p5
6 │ UUID=ed5e0803-dd6b-434e-8094-635498d65036 / btrfs rw,noatime,compress=lzo,ssd,space_cache=v2,subvolid=256,subvol=/@,subvol=@ 0 0
7 │
8 │ # /dev/nvme0n1p1
9 │ UUID=3C4A-3D26 /boot vfat rw,relatime,fmask=0022,dmask=0022,codepage=437,iocharset=iso8859-1,shortname=mixed,utf8,errors=remount-ro 0 2
10 │
11 │ # /dev/nvme0n1p5
12 │ UUID=ed5e0803-dd6b-434e-8094-635498d65036 /home btrfs rw,noatime,compress=lzo,ssd,space_cache=v2,subvolid=257,subvol=/@home,subvol=@home 0 0
13 │
14 │ # /dev/nvme0n1p5
15 │ UUID=ed5e0803-dd6b-434e-8094-635498d65036 /.snapshots btrfs rw,noatime,compress=lzo,ssd,space_cache=v2,subvolid=258,subvol=/@snapshots,subvol=@snapshots 0 0
16 │
17 │ # /dev/nvme0n1p5
18 │ UUID=ed5e0803-dd6b-434e-8094-635498d65036 /var/log btrfs rw,noatime,compress=lzo,ssd,space_cache=v2,subvolid=259,subvol=/@var_log,subvol=@var_log 0 0
19 │
───────┴──────────────────────────────────────────────────────────────────────────────────────────────────────────────────────────────────────────────────────────────────────────────────────────────

Kernel

最後にカーネルのソースコードを見ようかと思ったのですが,/usr/src 下にコードはありませんでした….

パッケージの追加

pacman は使えそうなのでためしに neofetch をインストールしてみます.ロゴは Arch なのかSteamOS なのか….

まずはパッケージのデータベースを更新します.(jupiter と holo はArch では見たことがない名前ですね.)

(deck@steamdeck src)$ sudo pacman -Sy
[sudo] password for deck:
:: Synchronizing package databases...
jupiter is up to date
holo is up to date
core is up to date
extra is up to date
community is up to date
multilib is up to date

次に neofetch をインストールします.

...失敗しましたね.

(deck@steamdeck src)$ sudo pacman -S neofetch
resolving dependencies...
looking for conflicting packages...

Packages (1) neofetch-7.1.0-2

Total Installed Size: 0.33 MiB

:: Proceed with installation? [Y/n]
(1/1) checking keys in keyring [########################################################################] 100%
(1/1) checking package integrity [########################################################################] 100%
(1/1) loading package files [########################################################################] 100%
(1/1) checking for file conflicts [########################################################################] 100%
(1/1) checking available disk space [########################################################################] 100%
:: Processing package changes...
(1/1) installing neofetch [########################################################################] 100%
warning: warning given when extracting /usr/bin/neofetch (Can't create '/usr/bin/neofetch')
warning: warning given when extracting /usr/share/licenses/neofetch/ (Can't create '/usr/share/licenses/neofetch')
warning: warning given when extracting /usr/share/licenses/neofetch/LICENSE.md (Failed to create dir '/usr/share/licenses/neofetch')
warning: warning given when extracting /usr/share/man/man1/neofetch.1.gz (Can't create '/usr/share/man/man1/neofetch.1.gz')
Optional dependencies for neofetch
catimg: Display Images
chafa: Image to text support
feh: Wallpaper Display
imagemagick: Image cropping / Thumbnail creation / Take a screenshot
jp2a: Display Images
libcaca: Display Images
nitrogen: Wallpaper Display
w3m: Display Images
xdotool: See https://github.com/dylanaraps/neofetch/wiki/Images-in-the-terminal [installed]
xorg-xdpyinfo: Resolution detection (Single Monitor) [installed]
xorg-xprop: Desktop Environment and Window Manager [installed]
xorg-xrandr: Resolution detection (Multi Monitor + Refresh rates) [installed]
xorg-xwininfo: See https://github.com/dylanaraps/neofetch/wiki/Images-in-the-terminal [installed]
:: Running post-transaction hooks...
(1/1) Arming ConditionNeedsUpdate...
touch: setting times of '/usr': Read-only file system
error: command failed to execute correctly

ファイルを持ってくることはできたけど /usr 以下に書き込めなかったという感じでしょうか.

しかし,ls -l / した限りでは root なら書き込めそうです.

(deck@steamdeck src)$ ls -l /
total 71
lrwxrwxrwx 1 root root 7 Apr 29 2022 bin -> usr/bin
drwxr-xr-x 1 root root 136 Dec 14 08:40 boot
drwxr-xr-x 21 root root 4120 Dec 17 21:49 dev
drwx------ 4 root root 16384 Jan 1 1970 efi
drwx------ 4 root root 16384 Jan 1 1970 esp
drwxr-xr-x 1 root root 1024 Dec 17 23:24 etc
drwxr-xr-x 5 root root 4096 Dec 17 17:34 home
lrwxrwxrwx 1 root root 7 Apr 29 2022 lib -> usr/lib
lrwxrwxrwx 1 root root 7 Apr 29 2022 lib64 -> usr/lib
lrwxrwxrwx 1 root root 7 Apr 29 2022 mnt -> var/mnt
drwxr-xr-x 2 root root 4096 Dec 17 17:34 opt
dr-xr-xr-x 332 root root 0 Dec 17 17:39 proc
drwxr-x--- 6 root root 4096 Dec 17 22:43 root
drwxr-xr-x 25 root root 600 Dec 17 20:28 run
lrwxrwxrwx 1 root root 7 Apr 29 2022 sbin -> usr/bin
drwxr-xr-x 4 root root 4096 Dec 17 17:34 srv
dr-xr-xr-x 12 root root 0 Dec 17 17:39 sys
drwxrwxrwt 15 root root 580 Dec 17 21:46 tmp
drwxr-xr-x 1 root root 80 Dec 17 23:23 usr
drwxr-xr-x 14 root root 1024 Dec 17 19:02 var

'/usr': Read-only file system とあるので,アクセス権限以前の問題でしょうか?

調べてみると他のユーザも同じ状況のようです.

How to solve the read only system /usr

Developper Mode にしても Read-only は消えないようですね.

Steam Deck Developer Mode does not turn off the read-only filesystem

ただし,上記2つの URL の先でも示されているのですが,解決策はあるようです.

公式による解決策:

What if I want to do more than what’s available by flatpak?

Totally fine, though it comes with several caveats. Make sure you know what you’re doing and be careful about running random commands / scripts you find on the internet - you may get your Steam Deck into a bad state or compromise your data. In addition, anything you install outside of flatpak (via pacman for instance) may be wiped with the next SteamOS update.

With that out of the way, if you are going outside flatpak and need to edit the read-only image, you can enable that with the following command:

sudo steamos-readonly disable

See below for instructions on using sudo with Steam Deck. One more warning to complete the warning sandwich – don’t do the above unless you know what you’re doing.

そのとおりにやってみたところうまく行きました.

(deck@steamdeck src)$ sudo steamos-readonly disable
[sudo] password for deck:
(deck@steamdeck src)$ sudo pacman -S neofetch
resolving dependencies...
looking for conflicting packages...

Packages (1) neofetch-7.1.0-2

Total Installed Size: 0.33 MiB

:: Proceed with installation? [Y/n]
(1/1) checking keys in keyring [########################################################################] 100%
(1/1) checking package integrity [########################################################################] 100%
(1/1) loading package files [########################################################################] 100%
(1/1) checking for file conflicts [########################################################################] 100%
(1/1) checking available disk space [########################################################################] 100%
:: Processing package changes...
(1/1) installing neofetch [########################################################################] 100%
Optional dependencies for neofetch
catimg: Display Images
chafa: Image to text support
feh: Wallpaper Display
imagemagick: Image cropping / Thumbnail creation / Take a screenshot
jp2a: Display Images
libcaca: Display Images
nitrogen: Wallpaper Display
w3m: Display Images
xdotool: See https://github.com/dylanaraps/neofetch/wiki/Images-in-the-terminal [installed]
xorg-xdpyinfo: Resolution detection (Single Monitor) [installed]
xorg-xprop: Desktop Environment and Window Manager [installed]
xorg-xrandr: Resolution detection (Multi Monitor + Refresh rates) [installed]
xorg-xwininfo: See https://github.com/dylanaraps/neofetch/wiki/Images-in-the-terminal [installed]
:: Running post-transaction hooks...
(1/1) Arming ConditionNeedsUpdate...

この方法でインストールしたパッケージは SteamOS のアプデートで消える可能性があるようなので Flatpak を使ったほうが良いみたいですが,とりあえずこれで何でもできますね.

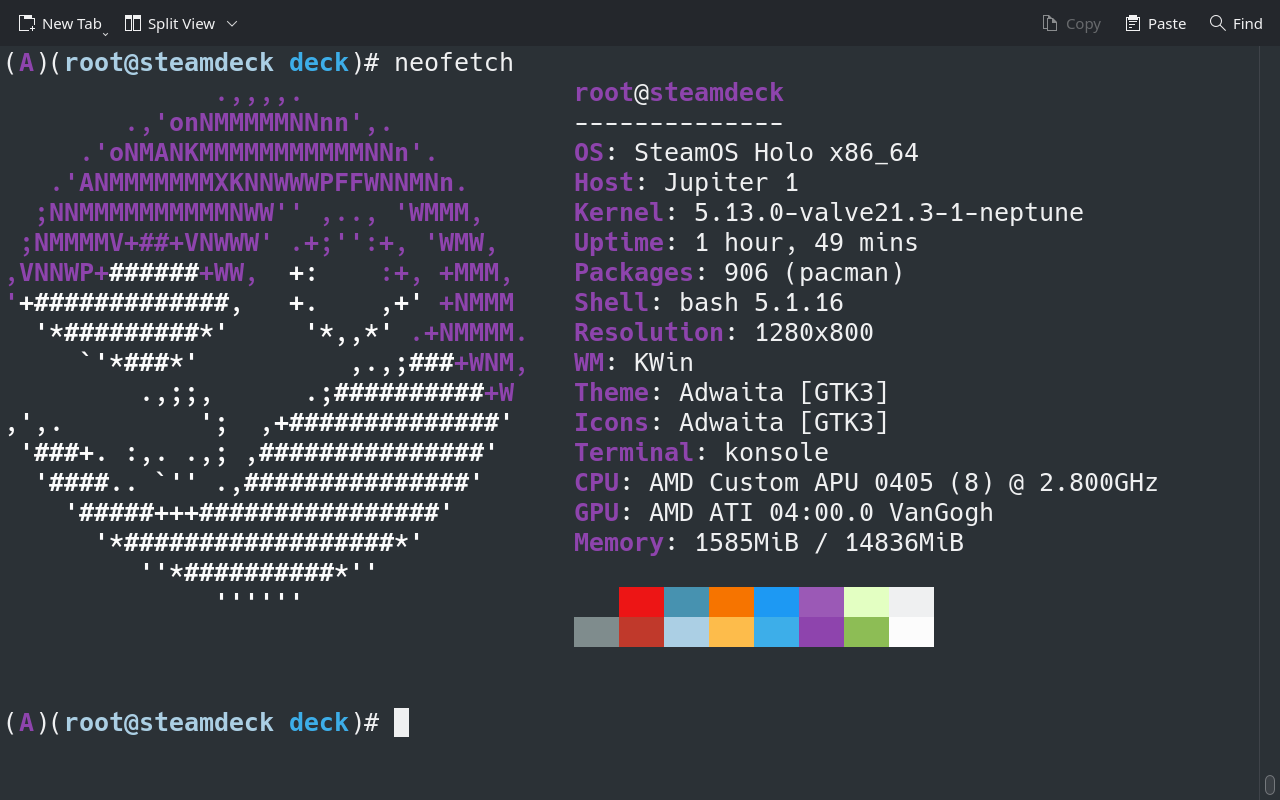
neofetch の実行結果は冒頭の通りでした.Steam のロゴマークでしたね.

おわり

Steam Deck は(一応)一般向けのゲーム機という位置づけなのでシステムが壊れないようにある程度の制限はあるようです.

また,全体的にディレクトリ構造がデフォルトとは違う,パーティションなどが複雑に分割されている,mkinitcpio などあるはずのものがないなど,普段使っている Arch の環境と違うことが多かったです.

Linux の勉強も兼ねてまた今度じっくり中身を見てみようと思います.